一、场景构造
three.js基础
如果是刚接触3D引擎,关于three.js的基础知识可以参考之前的博客Three.js+tween.js 基础(一) 中的基本概念篇部分。(场景 、相机 、渲染器 、添加对象)
微信小游戏中使用three
使用微信开发者工具创建新的小游戏模板,AppID选择测试号,得到的是飞机大战的源文件,在这个基础上进行修改。

game.js:
1 | import './js/libs/weapp-adapter' |
game.json:
1 | { |
改为横屏游戏。
最后,清空images、audio和js文件夹。添加 libs 和main.js空文件到js文件夹。
最终得到: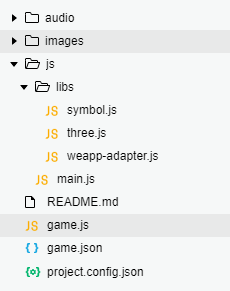
代码部分的修改在main.js。
静止的场景
代码主体部分:
1 | // 引入three |
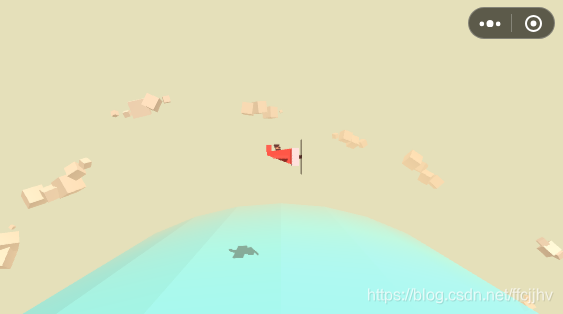
动画渲染
修改update():
1 | update() { |
添加 updatePlane(),更新每帧的飞机
1 | updatePlane() { |
为 Pilot 添加原型函数 updateHairs() ,让头发飘起来:
1 | Pilot.prototype.updateHairs = function () { |
更新每帧的海浪,为 Sea 添加原型函数 moveWaves() :
1 | Sea.prototype.moveWaves = function () { |
二、轮盘控制
创建UI部分
轮盘控制,分数信息,技能按钮这些部分和游戏主体分开,都创建在UI部分,使用新的场景和正交相机,需要保证在各个机型位置相对不变。这里只添加轮盘控制,分数信息,技能按钮以后再写。。。。
修改 start() 、loop() :
1 | start() { |
添加 createUI()
1 | createUI() { |
添加 UI 及其原型函数 add()、render()
1 | var UI = function () { |
添加轮盘 Controller
1 | var Controller = function () { |
轮盘控制
start()中添加事件监听,update()中更新每帧的鼠标位置和轮盘
1 | start() { |
添加 touchEvent() 事件监听,实时更新 mousePos
1 | touchEvent() { |
添加 updatePosition() ,更新当前轮盘位置
1 | updatePosition() { |
修改 updatePlane() ,更新当前飞机位置
1 | updatePlane() { |
代码主体部分:
1 | // 引入three |
相关链接:
Github项目地址
three.js官方文档
The Making of “The Aviator”: Animating a Basic 3D Scene with Three.js 翻译